Closure decisions directly affect operative efficiency and predictability of healing, particularly in busy operating rooms, where small variations in technique can influence workflow and turnover.
In this setting, skin staplers are often selected for rapid, repeatable closure in linear, time-sensitive incisions.
One study reported an average closure time of 10.89 minutes in the stapler group, showing its role in reducing procedural duration when used appropriately. However, outcomes still depend on correct technique, tissue handling, and timely removal.
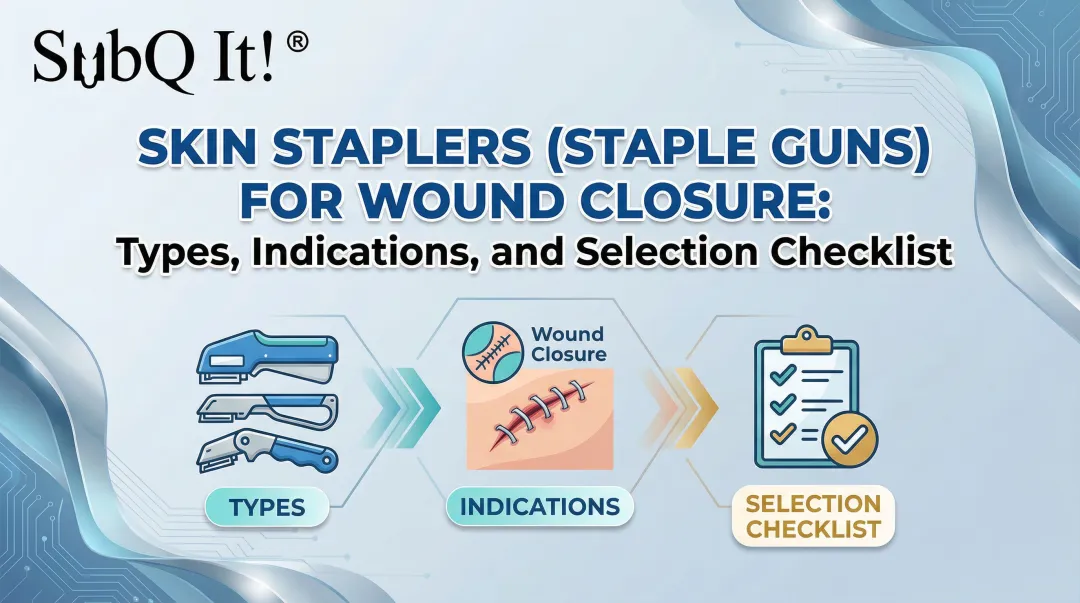
In this blog, you’ll learn how to use a skin stapler step-by-step for wound closure and the key factors that influence closure quality and surgical outcomes.
Key Takeaways:
- Skin staplers are most effective for clean, straight incisions where wound edges can be easily aligned without significant tension.
- Common use cases include scalp, trunk, and extremity wounds, particularly in settings where faster closure supports surgical workflow.
- Wound preparation includes adequate irrigation to remove debris, debridement of non-viable tissue, and achieving hemostasis before closure.
- Staple placement depends on consistent positioning, a near-perpendicular angle, and complete device activation to ensure proper formation.
- Immediate inspection and correction of each staple maintains an accurate approximation and reduces complications during healing and removal.
When Should You Use a Skin Stapler?
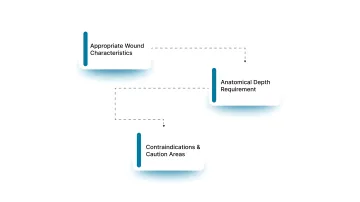
Skin staplers are selected when rapid, consistent skin closure is required without the need for fine cosmetic precision. Their use is driven by wound characteristics, anatomical location, and intraoperative priorities such as time and workflow efficiency.
The following considerations help determine when to use stapling and when to prefer alternative closure methods.
1. Appropriate Wound Characteristics
Skin staplers can reduce closure time by up to 66.6% compared to sutures, while delivering comparable cosmetic outcomes in selected cases.
They are best suited for linear, well-approximated lacerations or surgical incisions on the scalp, trunk, and extremities, where speed and procedural efficiency are important.
As a result, staplers are commonly used in abdominal incisions, orthopedic approaches, and scalp lacerations in both emergency and operative settings.
The following wound features determine suitability:
- Linear, clean incisions: Edges align naturally without significant manipulation
- Well-approximated wound margins: Minimal tension allows stable closure with staples
- Scalp, trunk, and extremity locations: Areas where cosmetic precision is less critical
- Procedural contexts prioritizing speed: Trauma, emergency care, and high-volume surgical workflows
- Absence of irregularity: Jagged or complex wounds typically require sutures for controlled approximation
In cases involving longer, linear incisions, device-assisted subcuticular systems, such as SubQ It! SU-25 may also be used to achieve consistent dermal approximation without the need for external staple placement.
2. Anatomical Depth Requirement
Staple placement should be performed only when underlying structures are adequately protected by soft tissue depth.
This works particularly in areas where tendons, nerves, or vessels are superficial. The decision relies on anatomical location and the surgeon's judgment.
Key anatomical considerations include:
- Adequate soft tissue coverage: Sufficient depth to avoid injury to underlying structures
- Low-risk anatomical zones: Areas where critical structures are not immediately superficial
- Stable tissue characteristics: Skin that allows consistent penetration and staple formation
- Avoidance of thin or delicate regions: Limited subcutaneous tissue increases the risk of poor placement
- Preference for sutures in high-risk areas: Provides better control over depth and tissue handling when precision is required
3. Contraindications and Caution Areas
Staplers are generally avoided in anatomical regions where cosmetic outcome, precision, or tissue mobility are primary concerns:
- Face and neck, where fine cosmetic alignment is required
- Hands and feet, due to functional sensitivity and discomfort
- Over joints or highly mobile areas, where movement can affect stability
- Irregular or complex wounds that cannot be aligned easily
Patients with known sensitivity to metal components may require alternative closure methods, although clinically significant reactions are uncommon.
When Staplers Are Not the Appropriate Choice:
Certain wound and procedural characteristics require alternative closure techniques:
- Deep wounds requiring layered closure, where dermal or subcutaneous sutures are necessary before skin closure
- Wounds under significant tension, where stapling alone may not provide adequate support
- Contaminated wounds without adequate irrigation or debridement
- Wounds requiring precise edge eversion or cosmetic alignment, where suturing provides better control
In these scenarios, staplers may still be used for superficial closure after proper preparation, but they should not replace appropriate layered techniques.
Before deciding whether a skin stapler is appropriate, ensure the right conditions and preparation are in place.
5 Things You Need Before Using a Skin Stapler
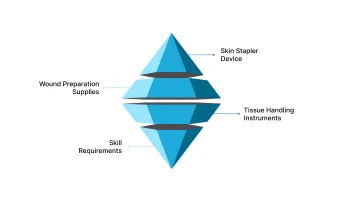
Successful staple closure depends on proper device selection, wound preparation, and tissue handling.
Inadequate preparation or poor technique increases the risk of complications, including poor approximation, difficult removal, or suboptimal healing.
The following components should be in place before initiating skin stapling.
1. Skin Stapler Device
Selection of a skin stapler is typically based on familiarity, ergonomics, and procedural context. Most modern staplers are disposable, preloaded devices designed for consistent staple formation with minimal variability.
Key considerations include:
- Device ergonomics and control: Choose a stapler that allows stable positioning and clear visibility of the wound edges
- Appropriate staple capacity: Ensure the device contains sufficient staples for the planned incision length
- Consistent staple spacing: Placement is typically guided by clinical judgement, with even spacing required for uniform tension distribution
- Reliable deployment mechanism: Smooth trigger action is critical for proper staple formation and avoidance of malformed staples
Rather than matching device size to fixed wound lengths, surgeons adjust spacing and placement technique based on incision characteristics.
2. Wound Preparation Supplies
Adequate wound preparation is essential for safe and effective closure, regardless of the chosen method. Proper cleaning, hemostasis, and aseptic technique directly influence healing outcomes.
Essential supplies include:
- Sterile irrigation solution: Used to remove debris and reduce bacterial load, with volume adjusted based on wound size and contamination
- Local anesthetic: lidocaine, with or without epinephrine, depending on location and patient factors
- Antiseptic solution: Chlorhexidine-alcohol is widely used for skin preparation due to its strong antimicrobial activity
- Sterile drapes and gauze: Maintain an aseptic field and allow controlled wound handling
Inadequate irrigation and debridement increase the risk of infection in any closure method. The focus should be on thorough wound preparation, not the choice between staples and sutures.
3. Tissue Handling Instruments
Precise tissue handling is required to achieve proper wound edge approximation during stapling. Key functions include:
- Accurate edge alignment: Ensures proper dermal contact before staple placement
- Controlled eversion of wound edges: Supports optimal healing and reduces the risk of edge inversion
- Maintaining sterility: Avoids direct hand contact with the wound
- Positioning tissue for consistent staple placement: Improves uniformity across the incision
While an assistant is often present in operative settings, these instruments also allow controlled closure when working independently.
4. Skill Requirements
Although staplers are designed for efficiency, proper technique is essential to avoid complications. Inconsistent angle, pressure, or positioning can lead to poor staple formation and suboptimal outcomes.
Before clinical use, surgeons should be comfortable with:
- Wound assessment and selection of appropriate closure method
- Principles of sterile technique and wound preparation
- Correct stapler positioning, angle, and trigger control
- Recognition and correction of improperly placed staples
- Proper staple removal technique and timing
Simulation-based practice can help build familiarity with device handling, but clinical proficiency ultimately depends on understanding tissue behavior and applying consistent technique.
Once the necessary preparation is complete, the next step is understanding the correct application technique.
6 Steps to Use a Skin Stapler in 2026
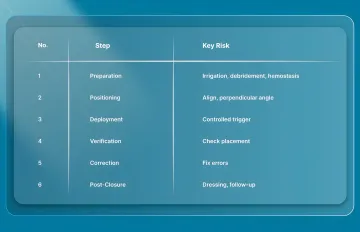
Effective skin stapling depends on consistent technique, proper tissue handling, and correct device positioning rather than speed alone. Each step directly influences staple formation, wound edge approximation, and ease of removal during follow-up.
1. Setup and Preparation
Proper wound preparation is essential to reduce the risk of contamination and ensure accurate staple placement. Closure should proceed only once the wound is clean and well-visualized, and hemostasis is achieved.
The following steps establish the foundation for safe and effective stapling:
- Irrigate the wound thoroughly: Use sufficient sterile solution to remove debris and reduce bacterial load, adjusting volume based on wound size and contamination
- Debride non-viable tissue: Remove devitalized tissue and foreign material to support proper healing
- Achieve hemostasis: Use pressure, cautery, or ligation as needed, since active bleeding obscures the field and may lead to hematoma formation.
- Ensure a clear operative field: Proper exposure and visibility are critical before initiating closure.
2. Stapler Positioning and Angle
Accurate positioning of the stapler determines how well the wound edges are approximated and how evenly staples are formed. Key positioning principles include:
- Align the stapler over the incision: Position the device so the staple is centered across the wound line
- Maintain stable contact with the skin surface: Hold the stapler perpendicular to, or nearly perpendicular to, the skin, adjusting as needed based on tissue characteristics.
- Avoid misalignment: Off-center placement can lead to asymmetric staple formation and poor edge approximation.
3. Staple Deployment
Staple deployment should be controlled and consistent to ensure proper formation and secure closure. Excess force or incomplete activation can result in poorly formed staples or tissue injury.
Follow these deployment steps:
- Apply gentle, controlled pressure: Enough to stabilize the device without driving the staple too deeply
- Fully activate the trigger: A complete squeeze is required for proper staple formation
- Avoid partial deployment: Incomplete activation results in malformed staples that must be removed and replaced
- Release before lifting the device: Prevents distortion or displacement of the formed staple
- Proceed sequentially: Place staples at consistent intervals to maintain even tension along the wound
4. Verifying Staple Placement
Each staple should be assessed immediately after placement to ensure proper approximation and avoid complications. Early identification of errors allows immediate correction before continuing closure.
Inspect for the following:
- Crown position: Slightly elevated above the skin surface to allow proper removal later
- Even leg penetration: Both sides should enter tissue at a similar depth
- Accurate edge approximation: Wound edges should meet without overlap or separation
- Correct orientation: Staples should sit perpendicular to the incision line
- Edge eversion: Skin edges should be slightly everted or flush, not inverted
Improper placement at this stage can affect the quality of healing and increase the difficulty of removal.
5. Correcting Misplaced Staples
Misplaced or malformed staples should be corrected immediately to prevent downstream complications. Leaving improperly formed staples in place can compromise wound integrity and healing.
Correction involves:
- Removing the staple using a proper remover: Insert beneath the crown and reform the staple during removal
- Controlling any bleeding: Address minor bleeding before reattempting closure
Immediate correction maintains consistency in closure and reduces the risk of complications.
6. Post-Closure Steps
After closure, appropriate dressing and follow-up planning are necessary to support healing and ensure timely staple removal. Post-closure care influences both patient comfort and cosmetic outcome. Key steps include:
- Apply a sterile dressing: Protects the wound and maintains a clean environment
- Consider topical ointment if appropriate: May reduce dressing adherence, although clinical benefit varies
- Plan follow-up evaluation: Ensure wound stability before complete staple removal
While the steps outline the process, certain best practices help refine the technique and improve overall outcomes.
4 Best Practices for Using Skin Staplers Effectively

The use of skin staplers depends on consistent technique, appropriate tissue handling, and sound surgical judgement rather than fixed rules. The following practices help ensure consistent results across different clinical scenarios.
1. Optimal Spacing
Staple spacing should be guided by wound length, tissue tension, and anatomical location. Consistent spacing helps distribute tension evenly and supports stable wound approximation.
- Maintain even spacing between staples: Typically guided by clinical judgement to ensure uniform tension along the incision.
- Avoid overly tight spacing: Excessively close placement increases foreign material without necessarily improving wound strength.
2. Systematic Approach
A structured closure sequence improves consistency and reduces variability in staple placement. Maintaining a predictable pattern helps distribute tension evenly across the wound.
- Use anchoring staples when needed: Place initial staples at key points to stabilize alignment before filling in between
- Maintain consistent technique throughout: Avoid variation in spacing, angle, or pressure across the incision.
3. Technique in Limited Assistance Settings
When assistance is limited, controlled tissue handling becomes even more important to maintain precision and sterility. Proper instrument use helps compensate for the absence of an assistant.
- Stabilize tissue with the non-dominant hand: Maintains control during placement.
- Operate the stapler with the dominant hand: Supports a consistent deployment technique.
4. Consider Bioabsorbable Alternatives
In cases where removal, cosmetic outcome, or workflow efficiency are key considerations, subcuticular closure systems offer an alternative approach to traditional external stapling.
These systems aim to combine the speed of mechanical closure with the benefits of internal fixation.
- Subcutaneous fastener placement: Fasteners are deployed beneath the skin rather than through the epidermis
- No removal requirement: Bioabsorbable materials are resorbed over time, eliminating follow-up removal
- Reduced surface marking: Avoids external puncture marks associated with percutaneous staples
Final Thoughts
Skin closure extends beyond mere approximation, influencing procedural efficiency, predictable healing, and consistent outcomes. As workflows evolve, closure methods must deliver speed and repeatability without added variability.
In this setting, systems such as SubQ It! SU-25 are designed for longer incisions, supporting closure lengths up to 25 cm through a device-assisted subcuticular approach.
By placing absorbable dermal fasteners beneath the skin, the system eliminates the need for staple removal and may reduce closure time when this step is significant.
Contact us today to explore how SubQ It! SU-25 fits into your surgical workflow and supports more consistent, efficient skin closure.
FAQs
1. How do skin staples work?
Skin staplers deploy metal staples that penetrate both wound edges and form into a closed configuration beneath the skin surface, approximating tissue. The staple crown remains above the skin, allowing secure closure and later removal.
2. When should staples be removed?
Staple removal timing depends on the location and the healing; it is usually within 7 to 14 days. Timing should be adjusted based on wound stability at follow-up.
3. Are skin staples better than sutures?
Staples generally allow faster skin closure, particularly in longer incisions, while sutures provide greater precision in cosmetically sensitive areas. The choice depends on wound characteristics, location, and clinical priorities.
4. What are the most common complications with skin staplers?
Complications include infection, visible scarring from surface puncture marks, difficult removal due to deep placement, and rare metal sensitivity. These risks are reduced with proper technique and appropriate timing of removal.
5. Can skin staples be used on all parts of the body?
Staples are typically used on the scalp, trunk, and extremities. They are generally avoided in cosmetically sensitive areas, highly mobile regions, or where precise edge control is required.
6. What should I do if a staple is misplaced during closure?
Remove the staple immediately using a staple remover, control any bleeding, re-approximate the wound edges, and replace it with correct positioning and technique to maintain closure integrity.