Post-operative wound care directly impacts patient outcomes, yet 67% of surgical site complications stem from improper closure or removal techniques. Straight-tip suture removal scissors—designed with a specialized hook on the lower blade—play a critical role in safely removing non-absorbable sutures without traumatizing healing tissue.
Proper selection and technique matter. Using the wrong scissor type or cutting incorrectly can lead to wound dehiscence, tissue damage, or retained suture fragments.
This guide covers when to use straight-tip scissors, essential safety protocols, and what to look for when purchasing these instruments for your surgical team.
TLDR:
- Straight-tip scissors excel for accessible, linear incisions on flat surfaces like the abdomen and extremities
- Always cut on the side opposite the knot to prevent dragging contaminated suture through tissue
- Steam sterilization at 132°C for 4 minutes is the CDC-recommended standard for reusable instruments
- Look for AISI 420/440 stainless steel construction and FDA clearance when purchasing
- Alternative closure systems like SubQ It!'s bioabsorbable staplers eliminate traditional suture removal needs
Understanding Suture Removal Scissors: Types and Designs
The Three Main Types
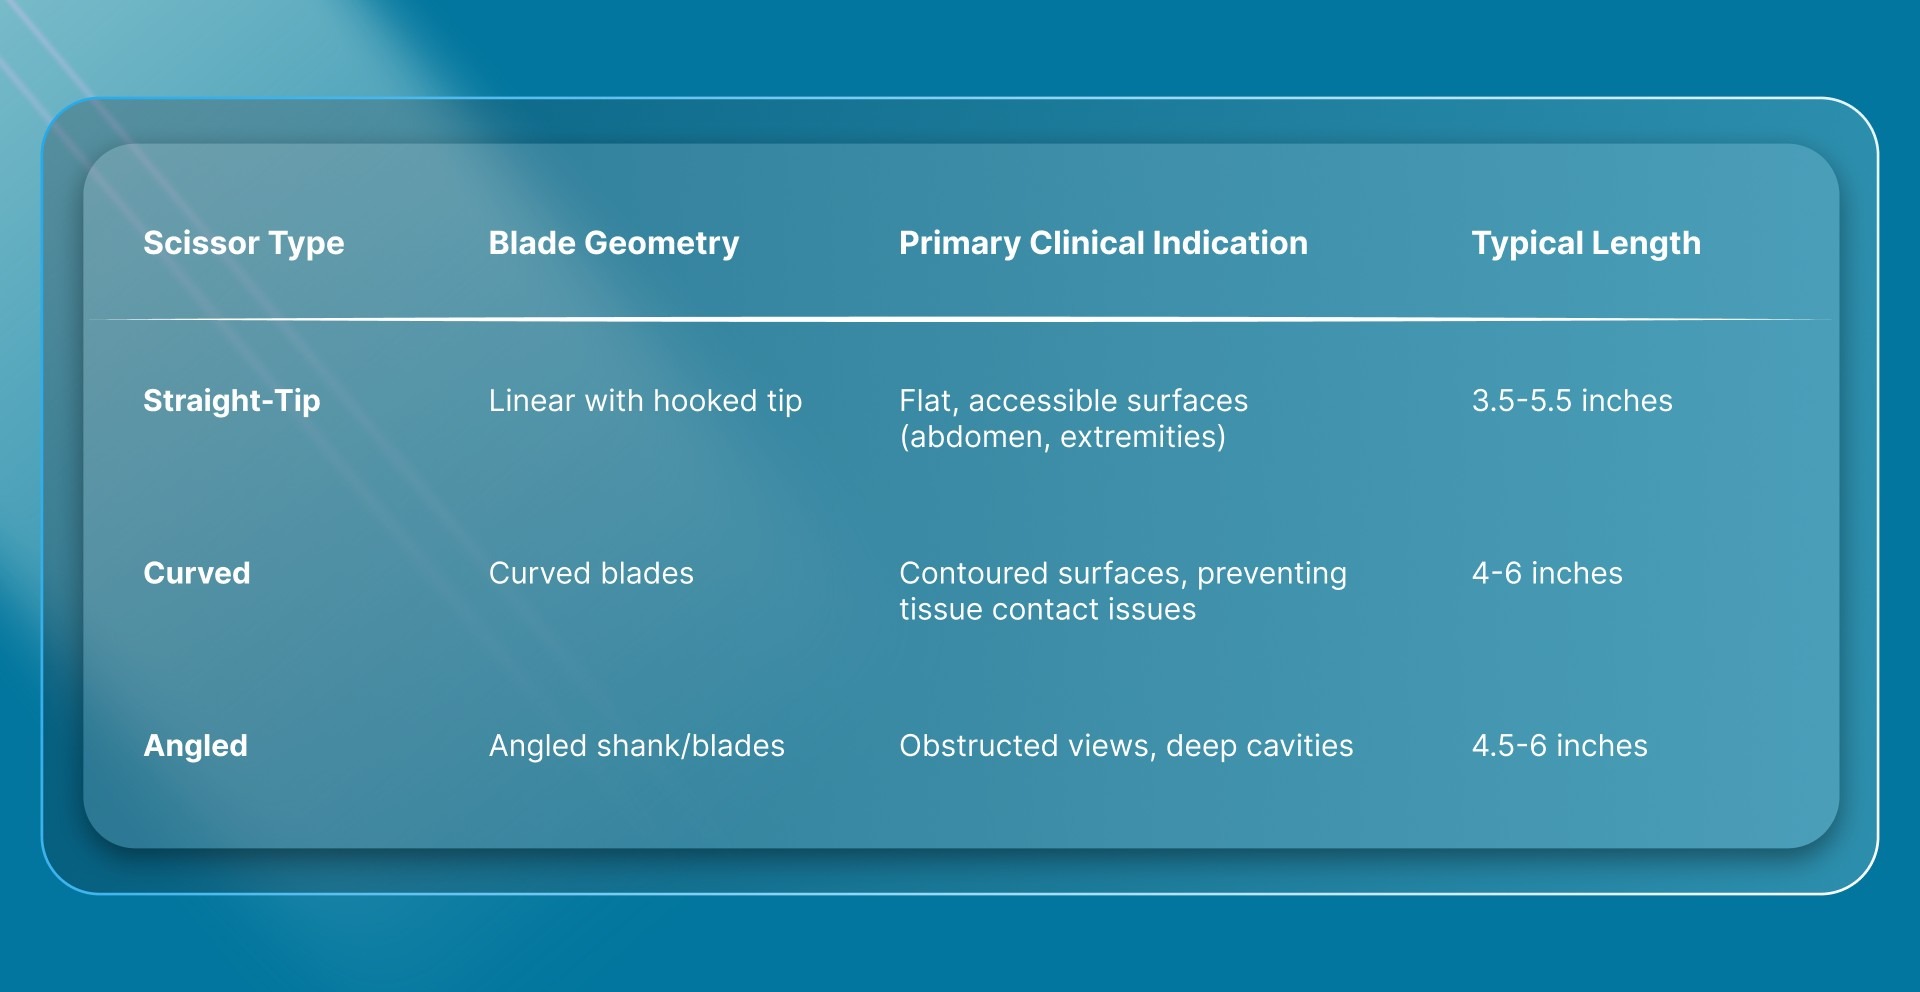
Suture removal scissors come in three distinct designs, each engineered for specific clinical situations:
Straight-Tip (Spencer/Littauer Pattern):
- Linear blade profile with a small hook or notch on the lower blade
- Hook slides under the suture loop, lifting it away from skin before cutting
- Standard lengths: 3.5 to 5.5 inches (8.9 to 14 cm)
- Material: Surgical-grade stainless steel (AISI 420/440)
- Most common type for accessible, flat wound sites
Curved Scissors: Feature blades that follow tissue contours, preferred for deeper or curved structures where straight access is limited.
Angled Scissors: Blades angled 45° or more relative to the handle, improving visibility in deep or restricted surgical sites.
The hooked tip on straight-tip scissors is the critical differentiator—it prevents the sharp blade from contacting skin while allowing precise suture engagement.
Design Comparison
Modern Alternative: Bioabsorbable subcuticular closure systems like SubQ It! eliminate the need for suture removal entirely. These devices place fasteners beneath the skin surface, which absorb naturally during healing—removing the need for removal scissors, follow-up appointments, and patient discomfort associated with traditional suture extraction.
When to Use Straight-Tip Suture Removal Scissors
Straight-tip scissors are the instrument of choice for:
- Easily accessible, linear incisions on flat body surfaces
- Superficial suture removal where visibility is clear
- Non-absorbable sutures in areas with good access (abdomen, extremities, back)
The straight blade profile provides superior control and precision when the wound site allows the instrument to lie parallel to the skin surface. Clinical guidelines from the American College of Surgeons recommend straight-tip scissors for trunk and limb closures where tissue depth is minimal.
Suture Types Best Suited for Straight-Tip Removal
The straight-tip design works best with specific suture materials and patterns.
Ideal suture materials:
- Nylon (polypropylene)
- Silk
- Polypropylene monofilament
- Non-absorbable synthetic materials
Suture pattern considerations:
- Interrupted sutures: Straight-tip scissors excel here, as each stitch can be individually grasped and cut
- Continuous (running) sutures: Require modified technique—cut at multiple points to create segments, then remove individually
Anatomical Considerations
Preferred body areas for straight-tip scissors:
- Linear surgical wounds on trunk
- Extremity incisions (arms, legs)
- Abdominal closures
- Back incisions
- Any flat surface with good visibility
Certain anatomical locations require alternative instruments due to access limitations or contour complexity.
When NOT to use straight-tip scissors:
- Curved surfaces (face, neck)
- Deep tissue areas where straight access is limited
- Facial procedures requiring precision around contours (use curved scissors)
- Recessed wounds where the blade angle limits visibility
Safety Protocols for Suture Removal
Pre-Removal Assessment
Proper timing is critical for suture removal. Before touching any instrument, assess wound readiness:
Clinical signs of adequate healing:
- Wound edges well-approximated (edges touching closely)
- Absence of erythema (redness)
- No edema or drainage
- Sufficient tensile strength to remain closed
Standard removal timelines by location:
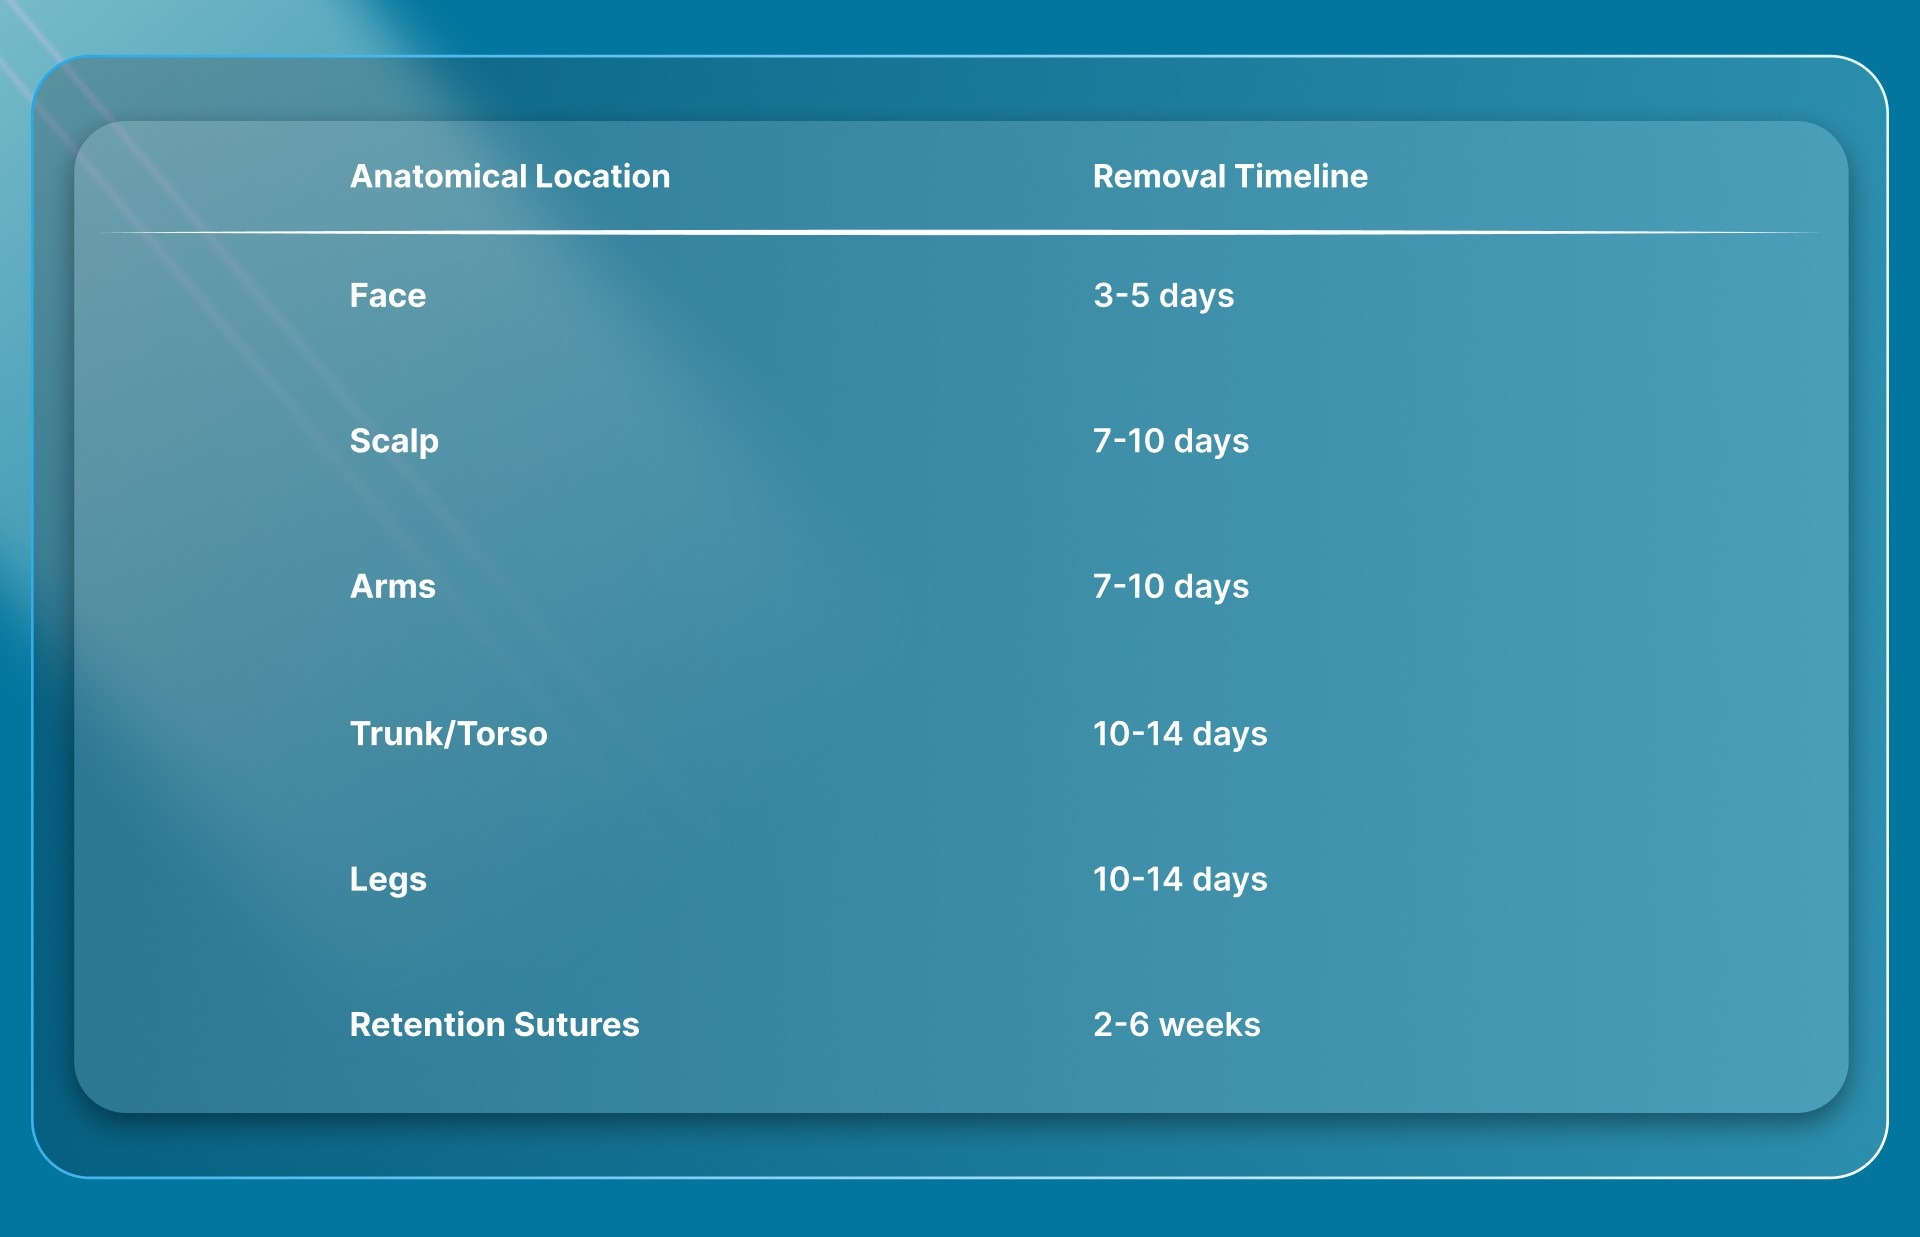
Timing directly impacts outcomes. Removing sutures too early risks wound dehiscence (wound reopening). Removing too late can cause "train track" scarring from prolonged tension.
With proper technique, these complications are preventable. Equipment sterility is your next critical checkpoint.
Sterility and Infection Control
Steam sterilization protocols (CDC standards):
- Gravity displacement autoclave: 121°C (250°F) for 30 minutes
- Prevacuum sterilizer: 132°C (270°F) for 4 minutes
- Drying time: 20-30 minutes for wrapped instruments
ISO 17664 mandates that manufacturers provide validated reprocessing instructions. Follow manufacturer guidelines for cleaning, disinfection, and sterilization.
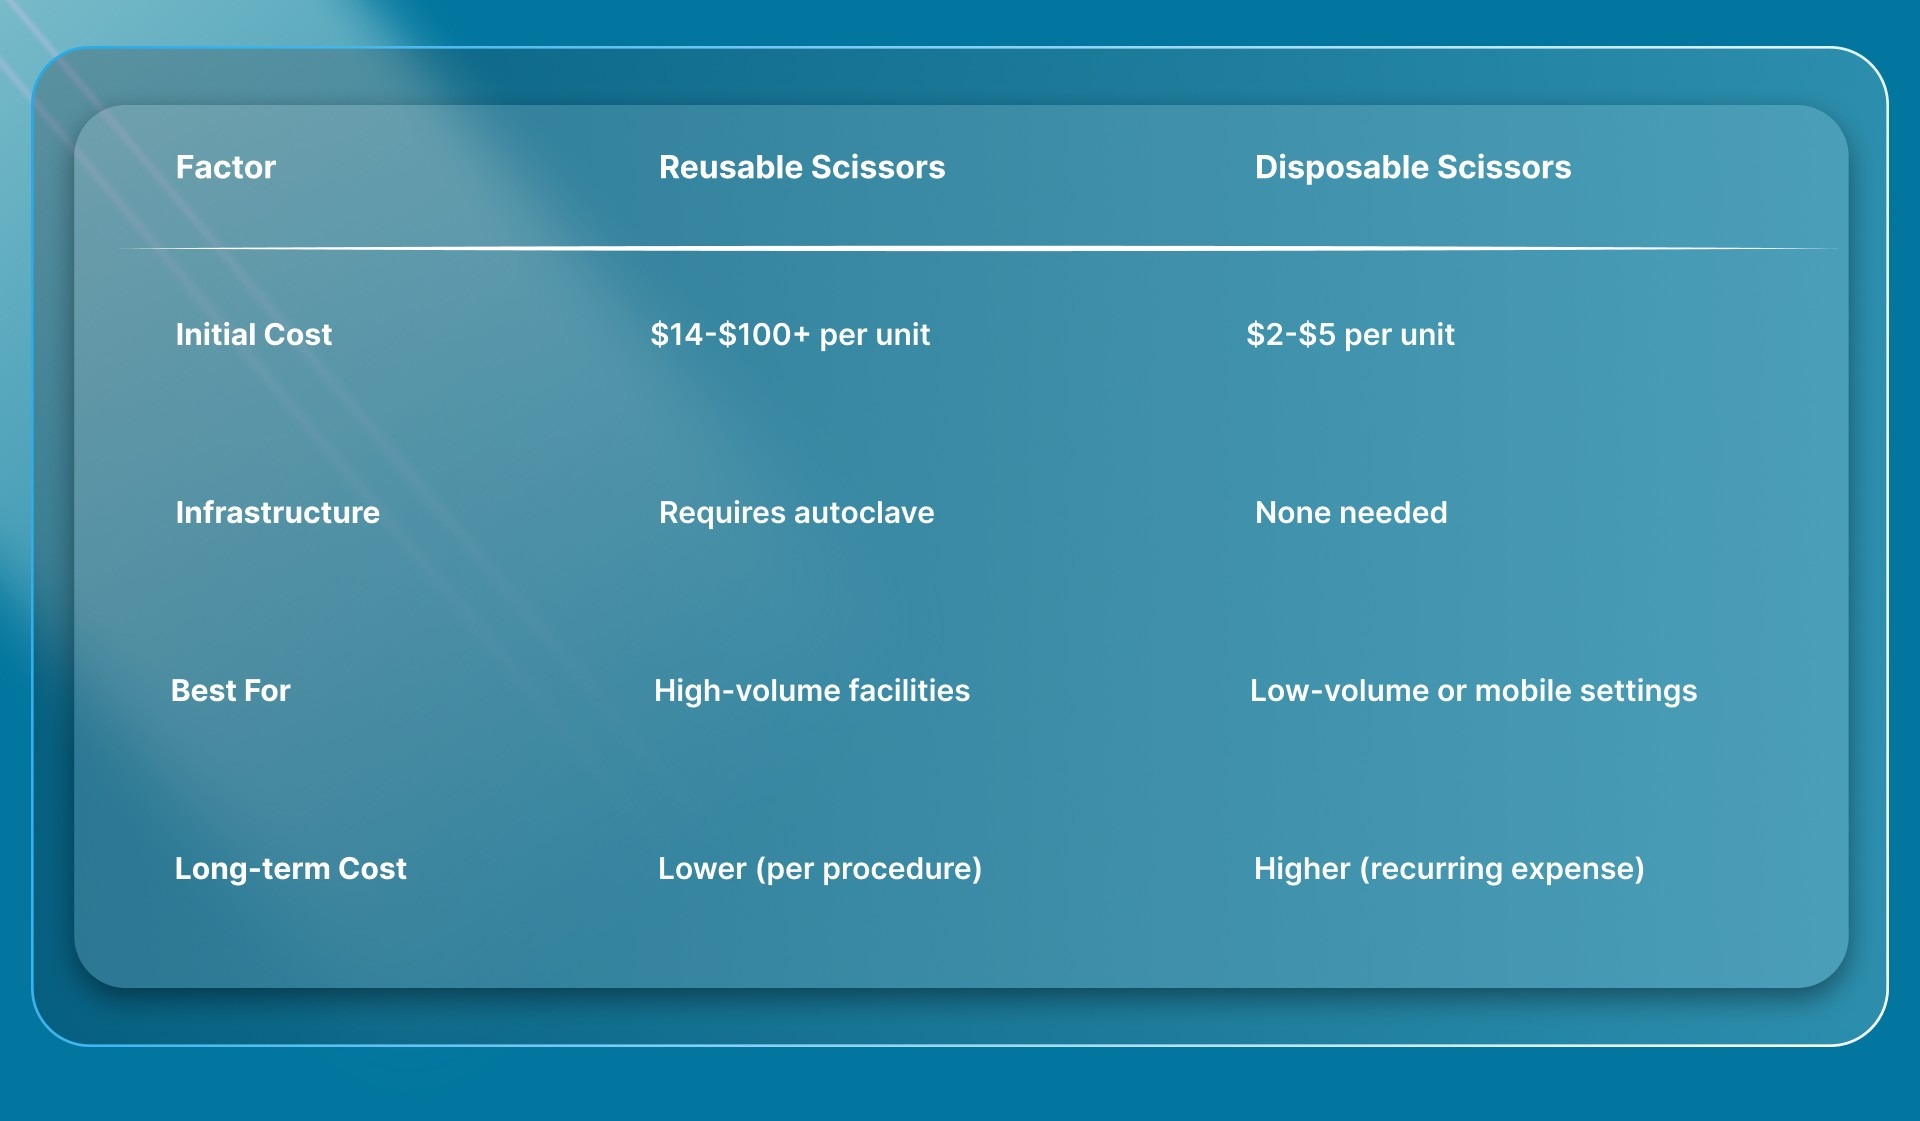
Disposable vs. Reusable Comparison:
Patient Safety Measures
Once equipment is ready, shift focus to patient preparation.
Preparation checklist:
- Position patient comfortably with wound site accessible
- Cleanse wound with antiseptic solution or sterile saline
- Remove dried serum and crusts that could harbor bacteria
- Explain procedure to minimize anxiety
Infection prevention:
- Use aseptic technique throughout
- Never reuse single-use instruments
- Maintain sterile field
Preventing Complications
Common complications and prevention:

The critical rule: Never cut both ends of the knot—the submerged portion cannot be retrieved if you do.
Modern bioabsorbable closure systems, such as those used in minimally invasive procedures, eliminate suture removal entirely. These systems absorb naturally after healing, avoiding removal complications altogether.
Step-by-Step Guide to Using Straight-Tip Scissors
Preparation and Setup
Required supplies:
- Sterile straight-tip suture removal scissors
- Sterile forceps (thumb forceps)
- Sterile gauze (2×2)
- Antiseptic solution or normal saline
- Steri-Strips (adhesive strips)
- Non-sterile gloves
Hand hygiene protocol:
- Decontaminate hands with soap and water or alcohol-based hand rub
- Don non-sterile gloves
- Maintain clean technique throughout
Technique for Removing Interrupted Sutures
- Cleanse the site - Remove debris and crusts with antiseptic solution
- Grasp the knot - Hold the knot with forceps and gently pull upward
- Position scissors - Slide the hooked tip under the suture loop, close to the skin on the side opposite the knot
- Cut - Snip the suture strand cleanly with one motion
- Remove - Pull the suture toward the wound side
- Inspect - Check that the entire suture is intact with no fragments left behind
Why cut opposite the knot? This prevents dragging the contaminated external portion (exposed to air and bacteria) through the tissue.
Technique for Removing Continuous Sutures
Continuous sutures differ from interrupted ones because they form a single thread along the incision. Use this modified approach:
- Identify anchor points - Locate where the continuous line begins and ends
- Cut at intervals - Snip the suture at multiple points (opposite the knots) to convert the continuous line into segments
- Remove segments individually - This prevents dragging long contaminated strands through tissue
- Count segments - Ensure all pieces are accounted for
Post-Removal Wound Care
Immediate care:
- Cleanse the site with antiseptic solution
- Apply Steri-Strips across the incision line to provide continued tension support
- Apply bandage if indicated
Patient instructions:
- Keep the site clean and dry for 24-48 hours
- Watch for signs of infection (redness, warmth, drainage)
- Avoid activities that stress the incision
- Return if wound edges separate
Common Mistakes to Avoid
Frequent errors that compromise outcomes:
- Cutting too close to the knot makes removal difficult and risks leaving fragments
- Pulling suture through tissue causes pain and can introduce bacteria
- Cutting the knot instead of the strand results in incomplete removal
- Removing sutures before adequate healing risks dehiscence
- Using dull scissors chews or folds the suture instead of cutting cleanly
Modern bioabsorbable closure systems like SubQ It! eliminate many of these risks by placing fasteners subcutaneously, requiring no removal and eliminating patient discomfort associated with traditional suture or staple removal.
Buying Checklist: What to Look for in Straight-Tip Suture Removal Scissors
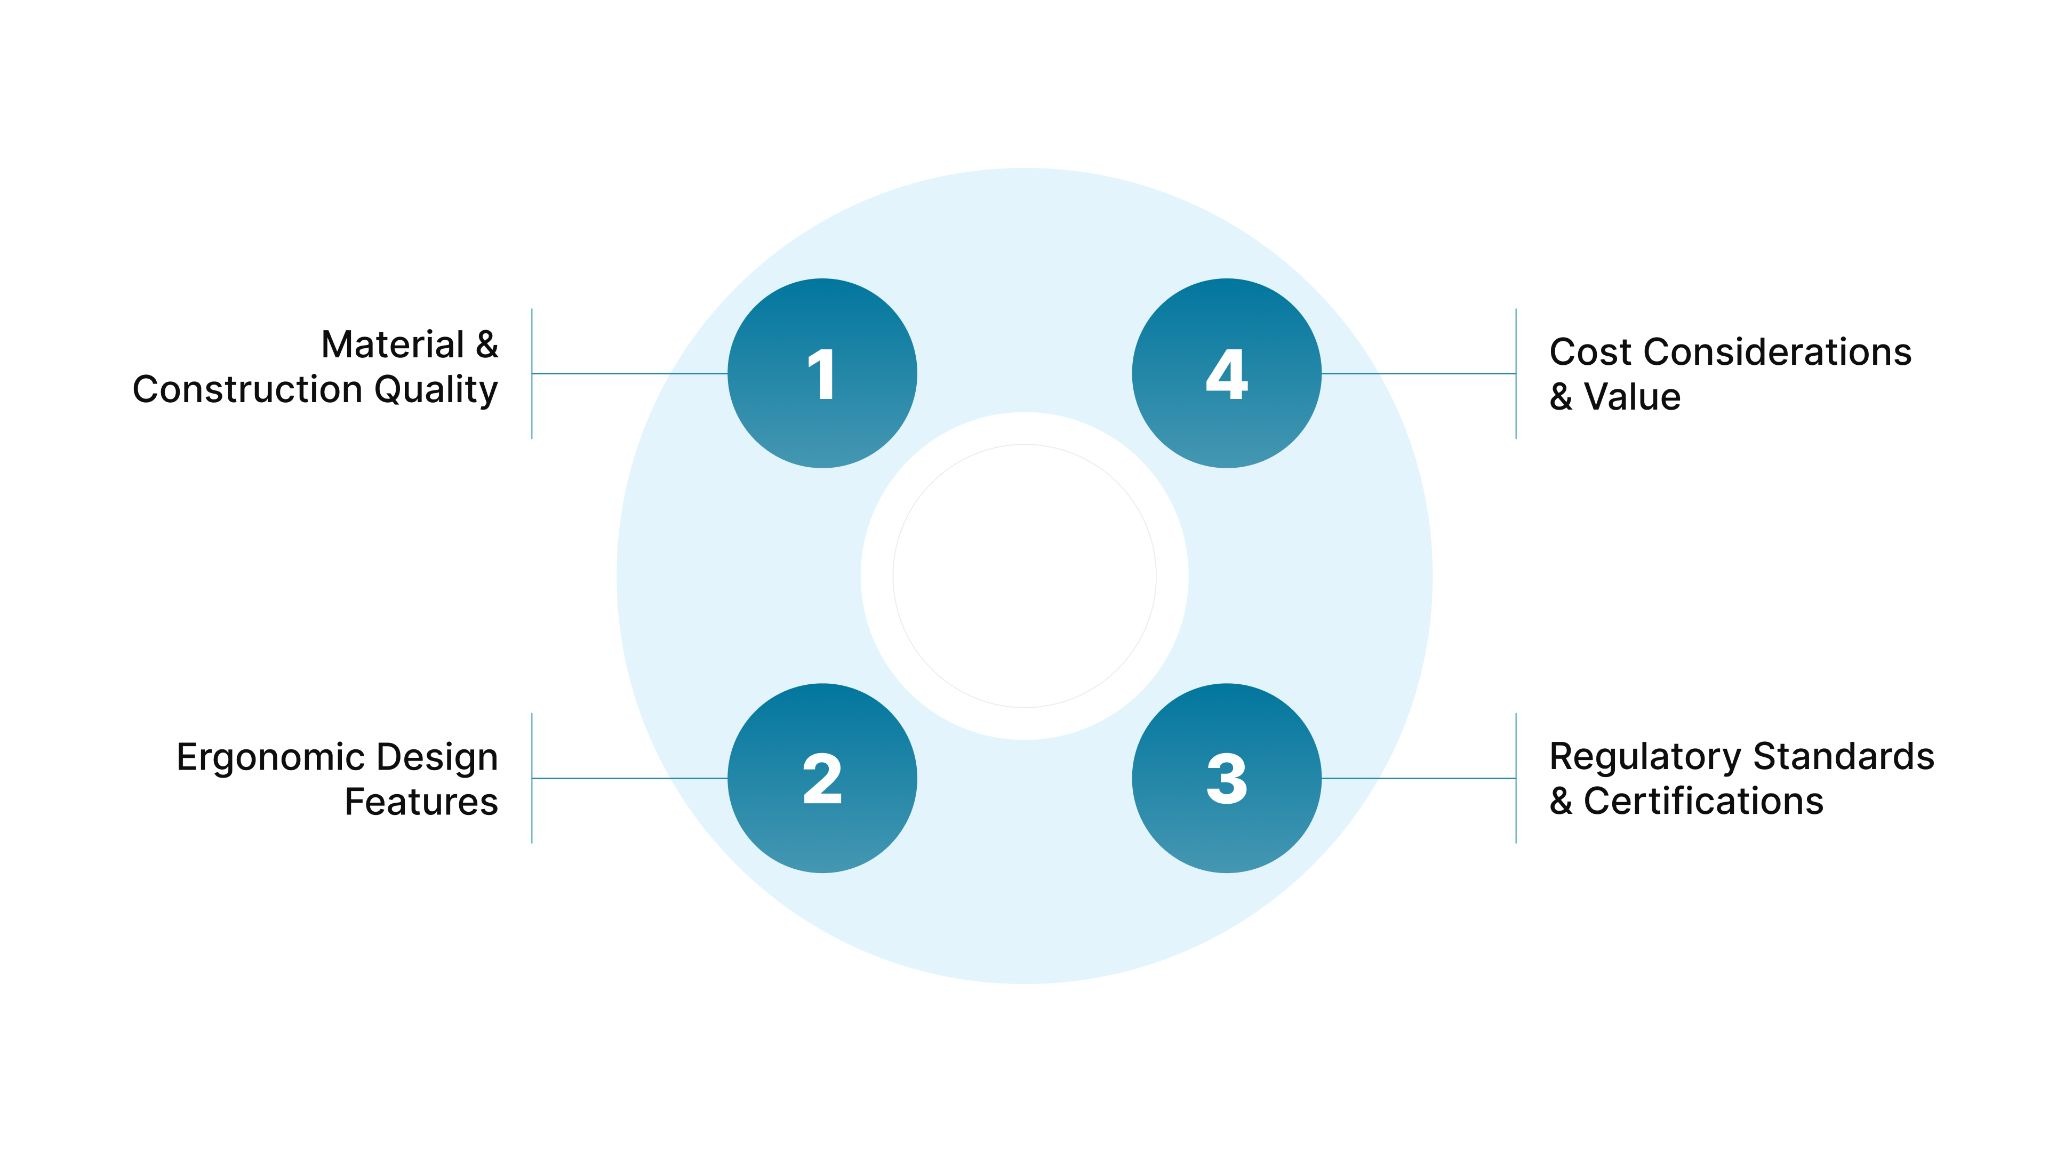
Material and Construction Quality
Stainless steel grades:
- AISI 420/440 (martensitic): Preferred for cutting edges with superior hardness and edge retention
- AISI 316/316L (austenitic): Better corrosion resistance but lower hardness
Quality indicators:
- Sharp, precisely ground cutting edges
- Edge retention through multiple sterilization cycles (50+ uses)
- Smooth box lock (joint) with no play
- Corrosion-resistant finish
High-quality scissors with tungsten carbide inserts or hardened stainless steel maintain sharpness longer, reducing replacement frequency.
Ergonomic Design Features
When evaluating ergonomics, prioritize:
- Handle style: Finger ring handles provide control and stability
- Ring sizing: Should accommodate gloved fingers comfortably
- Overall length: 3.5 inches for delicate work, 4.5-5.5 inches for general use
- Weight balance: Instrument should feel balanced in hand
Proper ergonomics reduce hand fatigue during multiple consecutive suture removals—especially critical in high-volume practices.
Regulatory Standards and Certifications
Look for these compliance markers:
- FDA clearance: Surgical scissors are Class I medical devices; verify 510(k) clearance for specific models
- ISO 13485: Quality management certification for manufacturing processes
- ISO 17664: Ensures manufacturer provides validated cleaning and sterilization instructions
Purchasing from certified manufacturers ensures instruments meet safety standards and can be properly sterilized.
Beyond regulatory compliance, evaluate the total investment required.
Cost Considerations and Value
Total cost of ownership analysis:
Reusable scissors:
- Initial cost: $14-$100+ per instrument
- Sterilization cost: $2-$5 per cycle
- Lifespan: 50-200+ uses (depending on quality and maintenance)
- Best for: High-volume facilities with sterilization infrastructure
Disposable scissors:
- Per-unit cost: $2-$5
- No sterilization expenses
- Generates medical waste
- Best for: Low-volume settings, mobile clinics, or facilities without autoclaves
Alternative approach: Bioabsorbable closure systems like SubQ It! eliminate suture removal entirely. These systems use fasteners absorbed by the body over time, removing the need for removal instruments and follow-up appointments while improving patient comfort.
Factor in these variables when calculating costs:
- Usage frequency (procedures per month)
- Sterilization infrastructure availability
- Waste disposal costs
- Staff training requirements
Frequently Asked Questions
1. What are the different types of suture removal scissors?
The three main types are straight-tip (Spencer/Littauer), curved, and angled scissors. Straight-tip scissors have a hooked lower blade for flat surfaces like the abdomen. Curved scissors follow contours for facial areas, while angled scissors provide visibility in deep surgical sites.
2. When should you use straight-tip scissors instead of curved scissors?
Use straight-tip scissors for accessible, linear wounds on flat surfaces. Choose curved scissors for contoured areas (face, neck) or when body curves would obstruct a straight blade.
3. How do you sterilize suture removal scissors?
Use steam sterilization via autoclave: 132°C (270°F) for 4 minutes in prevacuum sterilizers, or 121°C (250°F) for 30 minutes in gravity displacement. Allow 20-30 minutes drying time and follow manufacturer ISO 17664 reprocessing instructions.
4. What are the key features to look for in quality suture removal scissors?
Look for AISI 420/440 stainless steel blades, ergonomic finger ring handles, appropriate size (4-5 inches for general use), and proper certifications including FDA clearance and ISO 13485.
5. How often should suture removal scissors be replaced?
Replace scissors when blades become dull (chewing or folding sutures instead of cutting cleanly), when corrosion or pitting appears, or when the box lock becomes loose. With proper maintenance, quality scissors can last 50-200+ sterilization cycles before requiring replacement.
6. Can suture removal scissors be used for other surgical purposes?
No. Suture removal scissors are designed specifically for cutting sutures and should not be used for cutting tissue, bandages, or other materials. Using them for other tasks dulls the blades, reduces accuracy, and can contaminate sterility for their intended use.